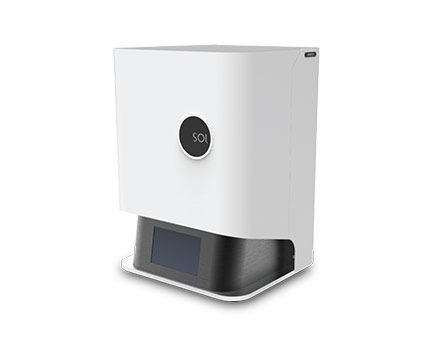
Support of SOL LCD 3D Printer | Roland DGA
Expandir Todo | Desplegar Todo
Removing the Hood & Back Cowling
3.01 MB
Replacing the Print Screen
221.63 KB
Replacing the Print Screen Driver Module
958.72 KB
Replacing the System Board
1.12 MB
Replacing the Z-Module
445.03 KB
Optiprint Guide Resin MSDS
738.04 KB
Optiprint Model Resin MSDS Sheet, Manufactured by Dentona
762.82 KB
Optiprint Splint Resin MSDS Sheet, Manufactured by Dentona
765.49 KB
Optiprint Temp Resin MSDS Sheet, Manufactured by Dentona
789.81 KB
Cleani User Guide
14.98 MB
CURIE User Manual
1.07 MB
SOL User Manual
2.94 MB
CLEANI Quick Start Guide
1.30 MB
To update the library, you must move the file to your micro SD. Do not modify the file name. You insert the micro SD in the CURIE. Then you can go to Settings>Update Material and press Yes for 5s.
38.79 KB
Curie Material updates
38.45 KB
Curie Post curing values
553.77 KB
CURIE Quick Start Guide
372.96 KB
SOL – Unboxing Your Printer
41.24 KB
SOL Quick Start Guide
7.88 MB
Alpha 3D (2.3.0)_Spotting islands & Auto + Manual Supports
41.07 KB
Alpha 3D Tutorials
38.43 KB
Alpha 3D Tutorials - Installation
40.66 KB
Alpha 3D Tutorials - Movement
41.04 KB
Alpha 3D Tutorials - Printing
41.10 KB
Alpha 3D Tutorials - Setting Up
33.81 KB
Alpha 3D Tutorials - Supports
40.94 KB
Alpha 3D Tutorials - View Controls
40.98 KB
Special Functions in Alpha 3D
41.09 KB
You can download the latest version (15/02/2022) for all printers: Alpha 3D Version 3.0.5
118.05 MB
A Validated Printing Workflow requires a flawless Post-Processing Procedure. This step is essential for the safety of your final result and its accuracy.
41.05 KB
When printing particularly small parts, it's best to place them in a tea strainer before washing. This way, you can avoid dropping small parts of your print to the bottom of your CLEANI.
41.07 KB
Quick tutorial on how to input your custom settings on Curie.
40.91 KB
This video shows how to calibrate the Z-axis on the SOL 3D printer. You will need a #2.5 hex key.
41.00 KB
This video shows how to download the log file from the SOL 3D printer. It is in ZIP format and there is no need to extract the contents. If you must supply the log file to DGSHAPE Support, you can simply send the ZIP file.
41.11 KB
This video shows how to remove the hood and back cowling from the SOL 3D printer. You must remove the hood & back cowling to get replace the system board and other components. You will need a #2, #2.5, and #3 hex key to remove the hood and back cowling.
41.12 KB
SOL – Replacing the Hood Module
40.87 KB
This video shows in detail the process for replacing the system board in your SOL 3D printer.
40.94 KB
This video shows how to replace the Z-module that enables and controls the movement of the build platform on your 3D printer. You will need to remove the hood and back cowling to replace the Z-module.
41.06 KB
SOL – Restoring Factory Settings
41.13 KB
You can always test the LCD panel as shown in this video to determine if there are any issues with the print screen.
40.98 KB
A collection of short videos that show some of the important things to keep in mind when you are working with a 3D printer.
41.17 KB
SOL Maintenance – Cleaning the Vat
41.21 KB
SOL Maintenance – Removing the Print from the Build Platform
41.29 KB
SOL Maintenance – Replacing the Print Screen
41.24 KB
SOL Maintenance – Setting up a Network Connection
41.27 KB
SOL Maintenance – Using the Clean Vat Function
41.12 KB
Operate your SOL in a temperature-controlled room, between 18°-25° C (64°-77° F).
SOL LCD 3D Printer Package Contents
You can print either over Wi-Fi or from your USB device.
You can easily operate your device from your computer. You can upload prints directly, and track print status. To set up your Wi-Fi connection:
There are four small boxes in the package and with the following contents:
SOL LCD 3D Printer Unboxing
The manufacturer is always adding new resins and improving functionality. If you are connected to the Internet, check for the latest firmware:
SOL LCD 3D Printer What you need
ARRIBA