You can easily add a spot gloss channel to any rasterized image by creating an alpha channel in Photoshop. This method allows you to create a spot gloss layer that can be fully adjustable upon output. Unlike using RDGGloss in Illustrator, which applies 100% gloss, Photoshop enables you to adjust the gloss levels to meet your needs. This technique is not limited to gloss; you can also apply it for white by naming the channel RDGWhite.
What is an Alpha Channel?
An alpha channel is a grayscale image that stores transparency information and selections within an image. It creates a mask over your chosen selection, separate from the background or other objects in your file, allowing precise control over transparency and effects.
Rasterized Images: What are They?
Raster images are made up of millions of pixels, unlike vector images, which are composed of clean and precise lines. For example, raster images at low resolutions may appear blurry or pixelated, especially for small text. In contrast, vector text remains sharp and clean-edged regardless of resolution because it is composed of lines.
Using alpha channels for spot gloss allows you to finely tune the gloss levels, providing greater flexibility and precision in your design projects.

Here are the steps on how to add an Alpha Channel to Photoshop
- Open your selected image into Photoshop. Once opened, you may see different panels to options on the right side of your screen depending on your layout of Photoshop.
- Select the Channels tab, showing either RGB or CMYK separate channels that compose your image.
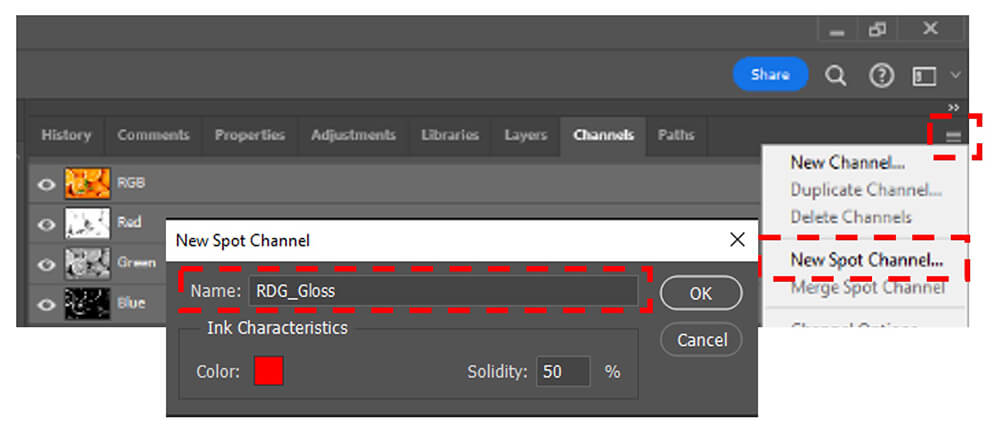
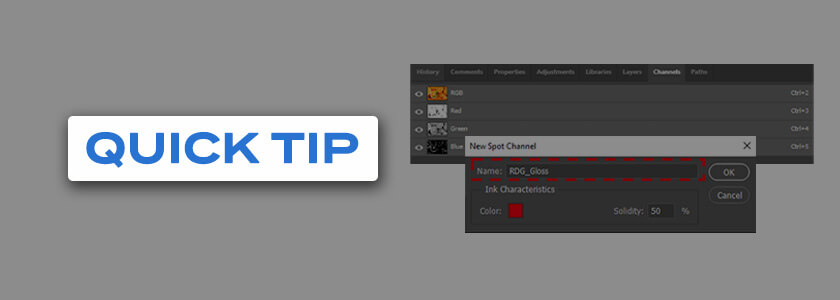
- If you look all the way at the end of this view of all panels (top right in image) you will see a box that has four horizontal lines. This gives you quick access to options under this channel tab. Click on this icon and you will see your option to add a New Spot Channel.
- Once you select New Spot Channel, a box will pop up asking for the name. It is very important that you use the same naming convention as we have for our illustrator plug-ins. (RDG_White, RDG_Gloss). You can choose the color you want Photoshop to view this channel with as a visual aid. You’ll also notice that the Solidity setting is currently set for viewing at 50%. If you change this to 100%, you will not be able to view the rest of your file.
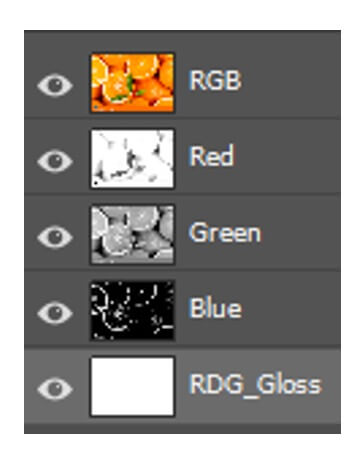
- Once you have this set up, you will see an additional channel showing RDG_Gloss that will not have any data in it yet. We will be adding this info in the following steps.
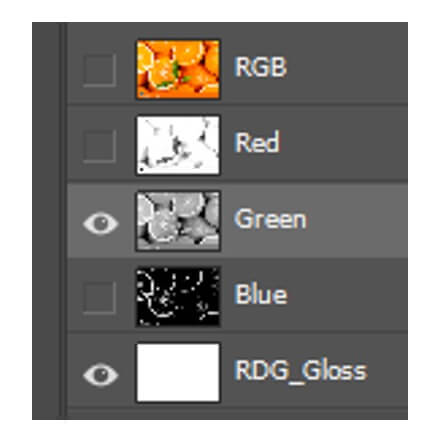
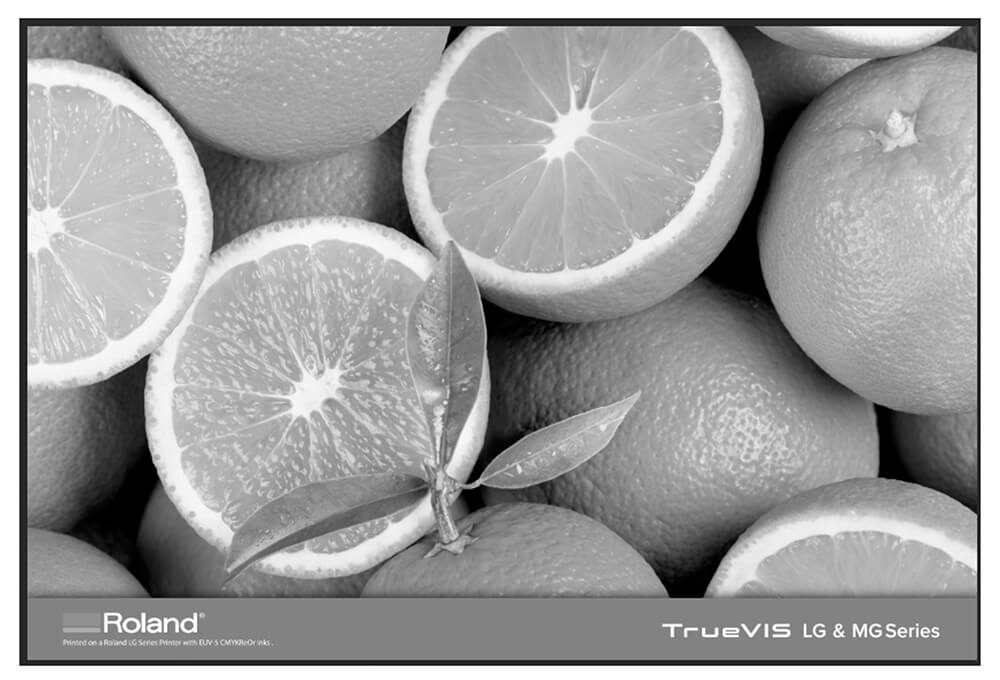
- There are multiple options for selecting what you want in your gloss channel. One simple way to do so is by utilizing one of your RGB or CMYK channels to make this gloss data very quickly. For this example, we will work with the Green channel and copy this data into the RDG_Gloss channel. You can turn off visibility to the other channels by clicking on the eye icon and selecting “off.”
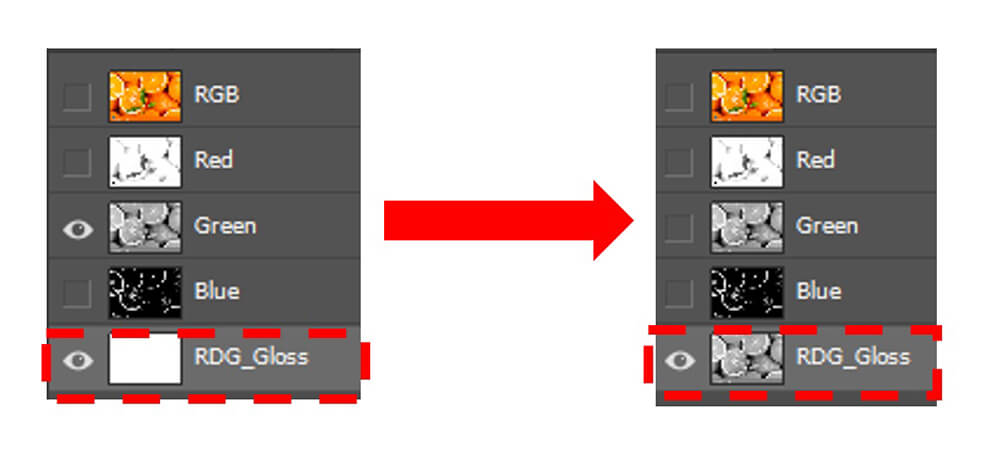
- Next step is copying this data over to the RDG_Gloss channel. An easy way to do this is by holding down the CTRL button on your keyboard and pressing A (CTRL+A). This will select the whole image.
- Once the whole image has been selected, we can now copy it by pressing CTRL+C. Select your RDG_Gloss channel and paste this data into that channel by pressing CTRL+V.
- You have now copied that data over to your gloss channel and it will output accordingly. The level of gloss will vary as it goes off the image data. So, if there are gradients in your image, it will gradient the gloss channel as well to match.
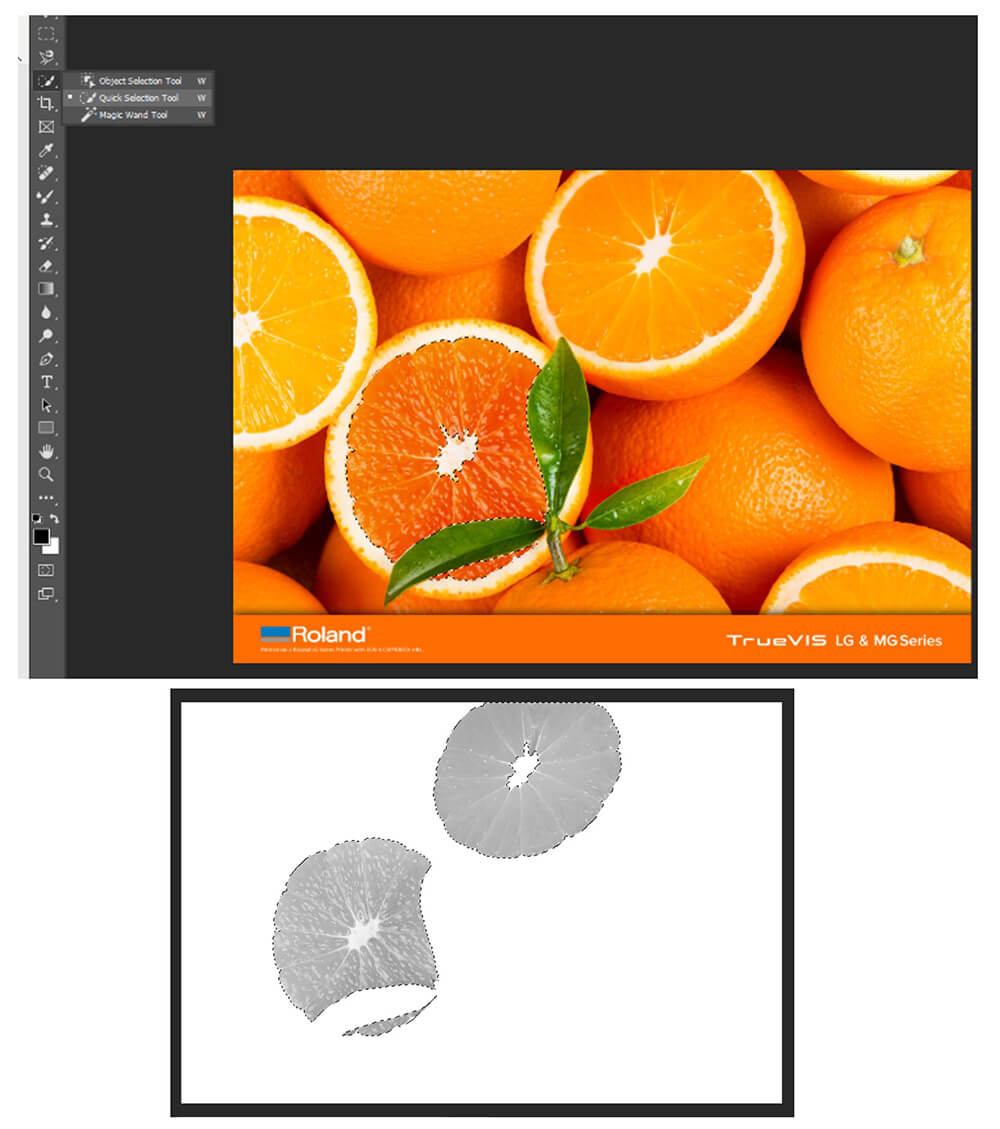
- You can also select parts of your image by using the Quick Selection tool, selecting an area of the image, and dragging your cursor around the area you would like to be gloss. Copy that selection into your gloss channel and you will now see that available.
- You will only see specific areas of the image – those areas that will now only print gloss where you have selected.
- Your file is now ready to be saved and opened in VersaWorks for production! VersaWorks will recognize the gloss data in your file.

