

Actualmente las impresoras de cama plana UV son máquinas extremadamente populares, ya que hacen fácil y rentable imprimir sobre casi cualquier objeto. Cuentan con diferentes tipos de tintas UV disponibles para una variedad de aplicaciones, junto con una amplia selección de sustratos rígidos sobre los que se puede imprimir directamente usando estos avanzados e increíblemente versátiles dispositivos.
Aunque las impresoras UV de cama plana son capaces de imprimir sobre prácticamente cualquier sustrato u objeto, siempre hay una posibilidad de que las tintas UV usadas se agrieten o desprendan con el paso del tiempo. La adhesión de las tintas UV depende de diversos factores, incluyendo la calidad del dispositivo y las tintas, así como el tipo de material sobre el cual aquellas tintas serán impresas. Tenga en cuenta que las tintas UV se asientan encima de su sustrato, a diferencia de las tintas eco-solventes que penetran en los sustratos sobre los que son impresas (p. ej., rollos de vinilo de rotulación de autos).
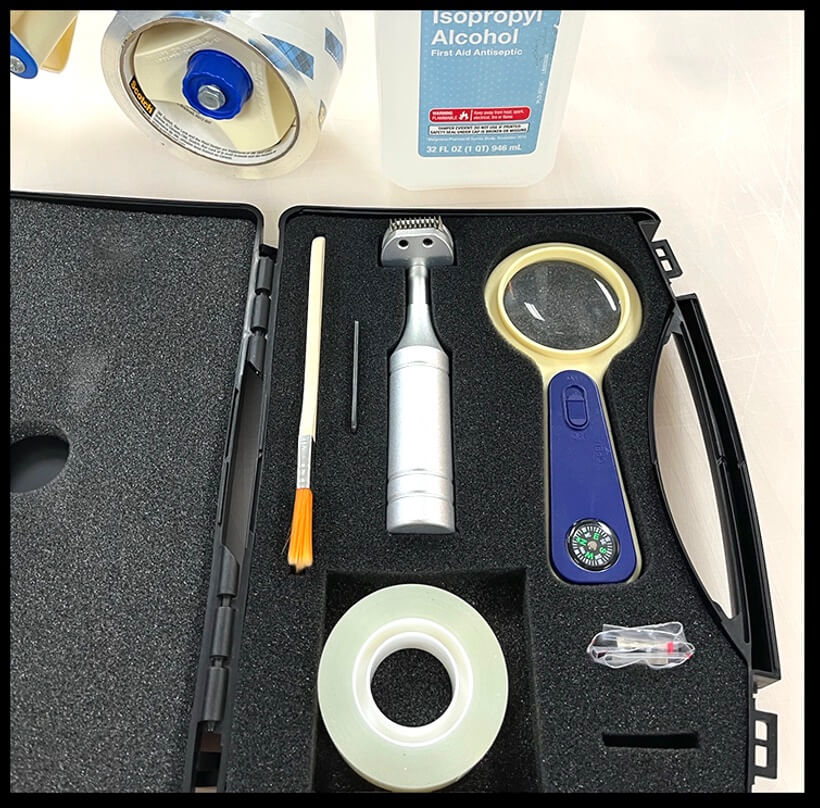
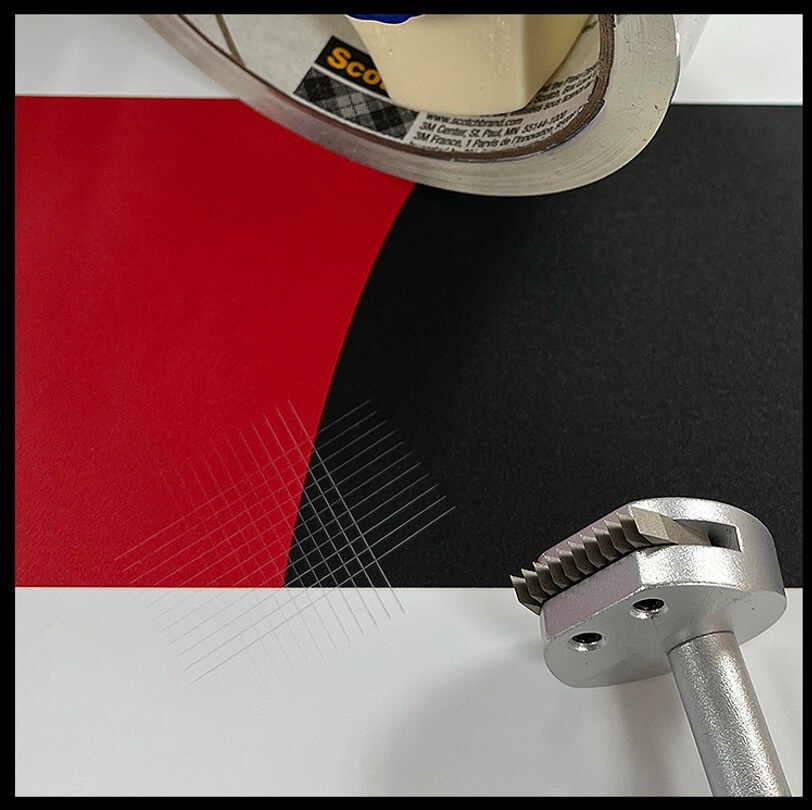
Las fotos mostradas debajo incluyen un ejemplo de procedimiento de prueba de adhesión de “trama cruzada”. Básicamente, este kit de pruebas traza surcos a través de las tintas hasta el sustrato, en un patrón cruzado.
Nota: este tipo de patrón de trama también se puede cortar usando una cuchilla para cortar cajas.
El mejor resultado posible con esta prueba es hacer que la tinta UV se desprenda solo donde se hicieron los patrones de corte. Si usted nota que se está desprendiendo mucha tinta UV, debe considerar usar un promotor de adhesión (pretratamiento), el cual generalmente se aplica a mano o se rocía antes de la impresión. Sin embargo, algunos dispositivos, como varios de los modelos de impresoras UV de Roland DG, tienen una opción de pretratamiento “incorporado” en sus respectivos juegos de tintas.
Si su impresora UV no tiene la opción de pretratamiento incluido, hay dos empresas que ofrecen promotores de adhesión para diferentes tipos de sustrato:
- SEM Products (producto XXX 77724)
- Marabu
Nota: antes de imprimir, asegúrese de limpiar la superficie del sustrato con alcohol isopropílico o una solución similar.
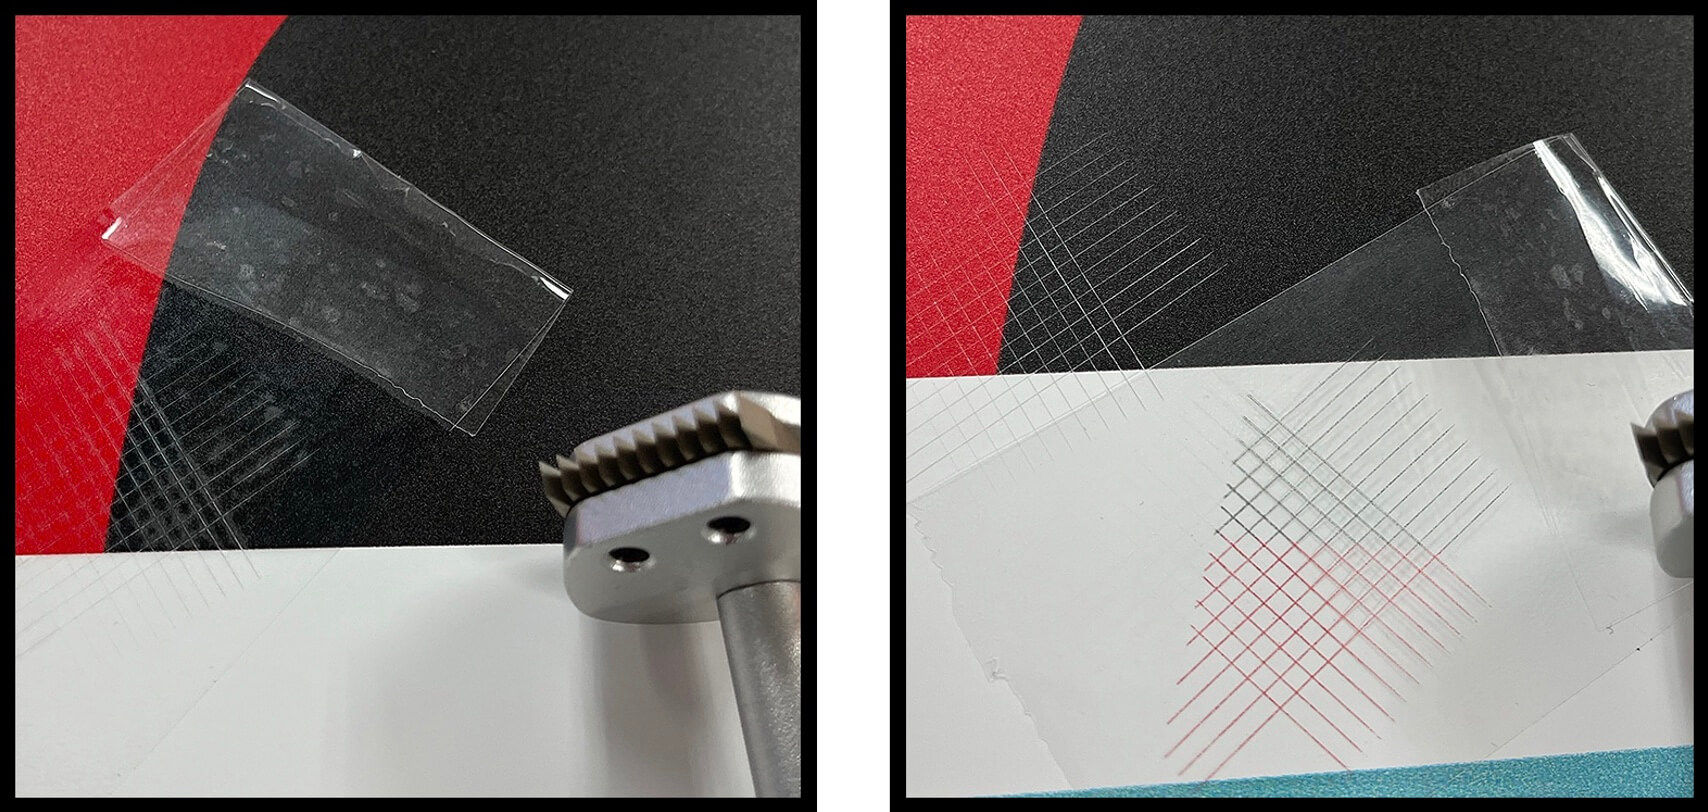
Aplique firmemente un pedazo de cinta de embalaje sobre el patrón, y luego retire la cinta con firmeza y rapidez. Este resultado es un ejemplo de perfecta adhesión: note cómo la cinta solo se llevó la tinta UV entre el patrón de trama cruzada.
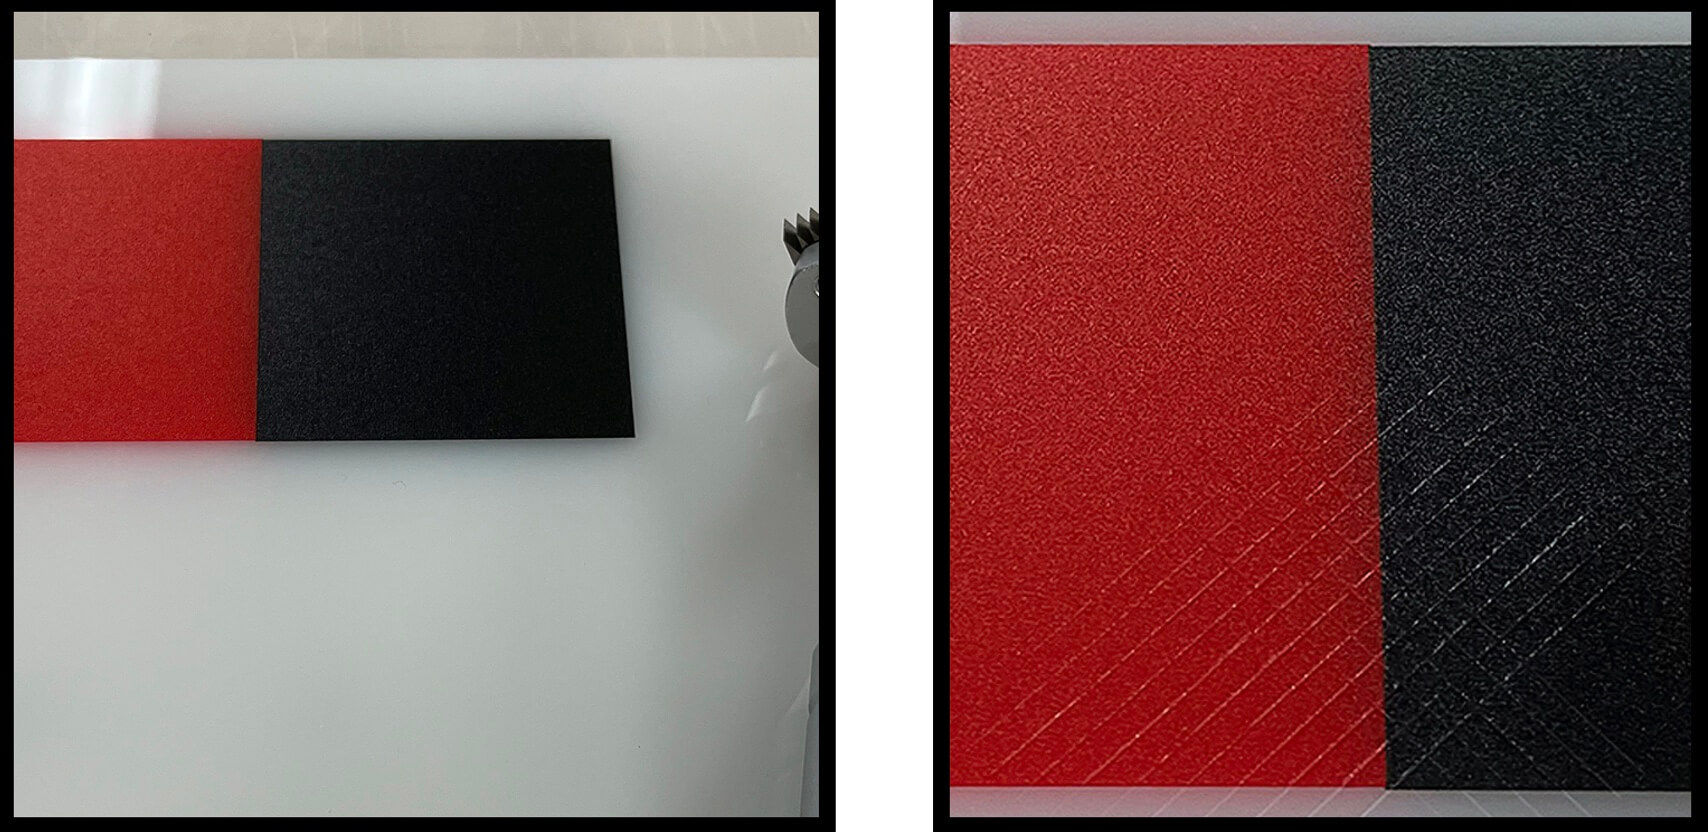
Este sustrato tiene una superficie muy dura, casi como el vidrio. Realizamos la misma prueba de patrón de trama cruzada que la que hicimos en el sustrato tipo Sintra® arriba.
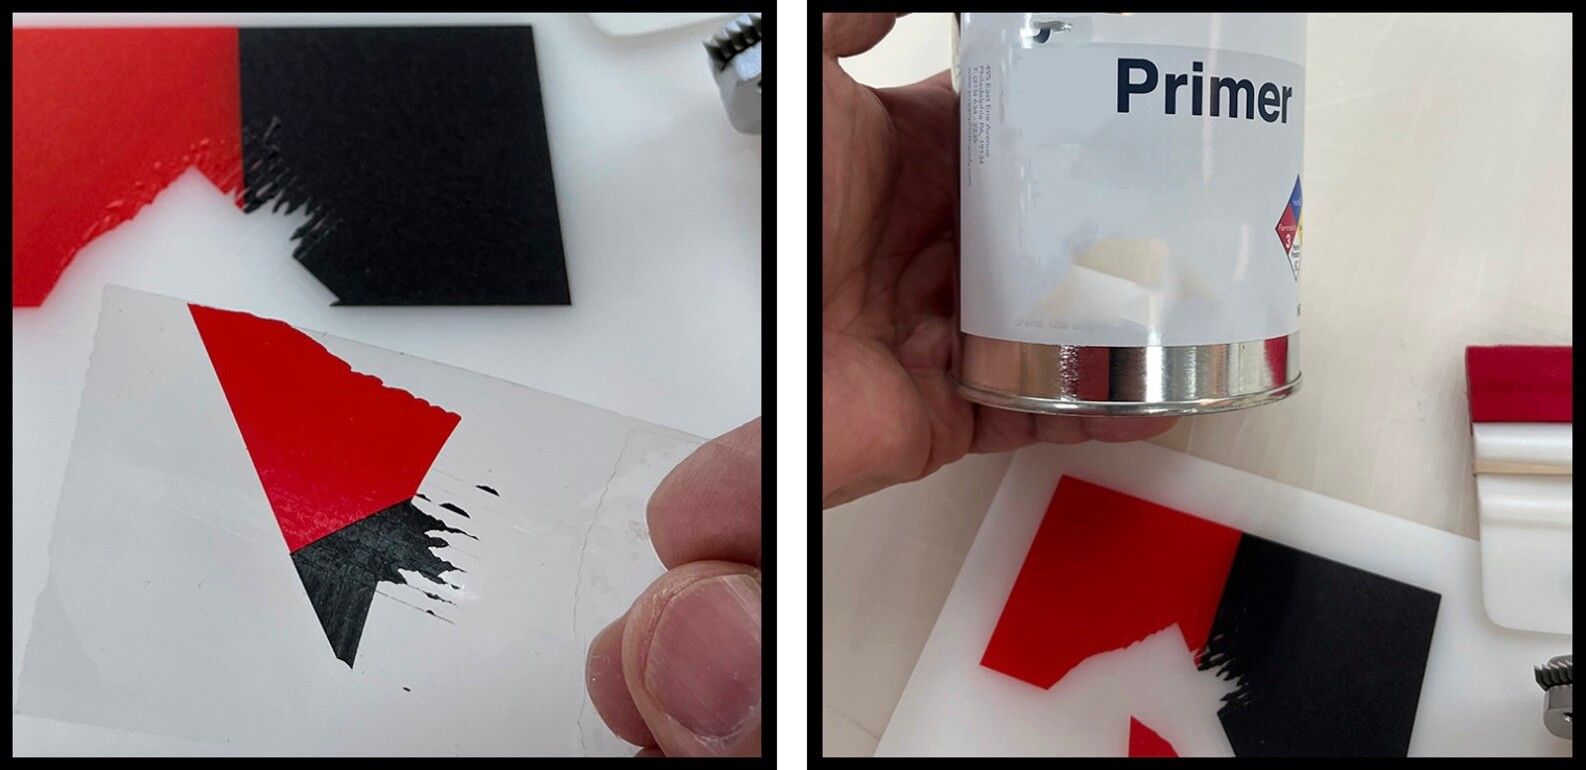
La prueba mostrada arriba dio un resultado fallido. Si usted encuentra este tipos de resultado, puede necesitar un promotor de adhesión para mejorar la fijación de sus tintas.
