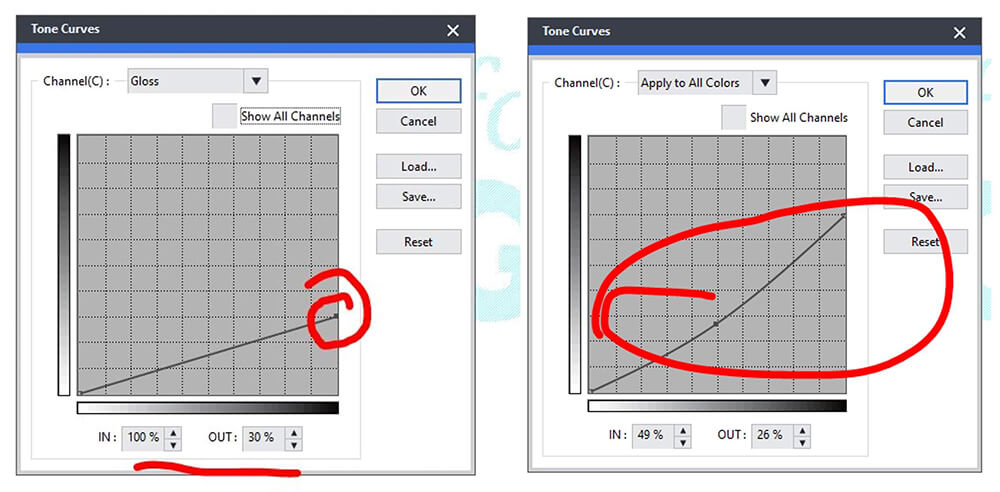
When printing a job, have you ever felt that the Gloss ink was just too overpowering? You may have found yourself wanting to reduce the amount of Gloss ink that was laying down, but you couldn’t because the FILE was built with Gloss in the Illustrator or Corel file.
Well, this Quick Tip will help resolve this problem. Here are two easy methods to control the Gloss level:
Method #1 - The Color Slider Adjustment
STEP 1
In VersaWorks, load the file that has the CMYK + GLOSS ink.

STEP 2
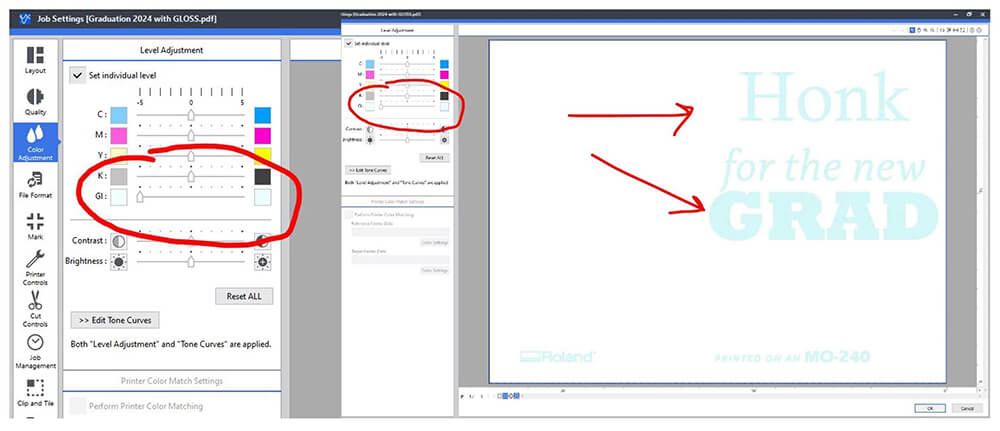
Go to the Color Adjustment tab in VersaWorks and adjust the Gloss Slider (Gl) to the LEFT. This will reduce the Gloss ink density.
Note: The value is -1 to -5, which may work well for simple jobs.
Method #2 - Edit Tone Curves
(For more accurate density adjustment)Note: If the method above was not able to produce the desired results, this next method will allow more precise control of the amount of Gloss-ink reduction.
STEP 1
In VersaWorks, load the file that has the CMYK + GLOSS ink.

STEP 2
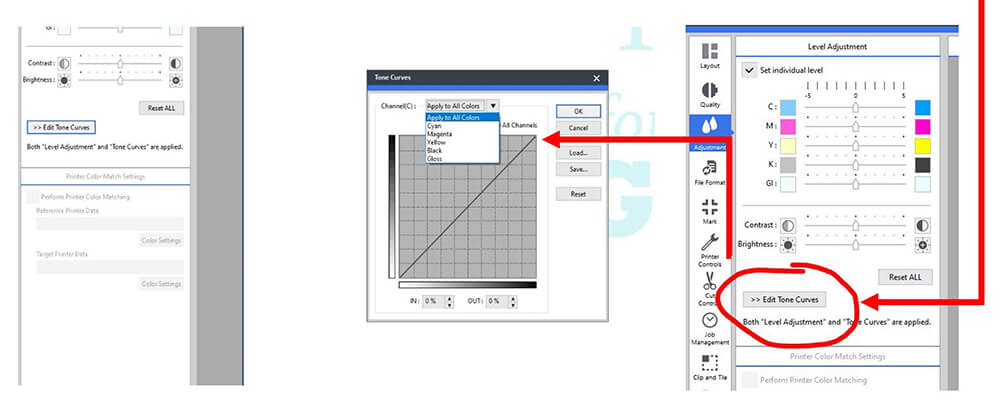
Go to the Color Adjustment tab in VersaWorks and click on Edit Tone Curve.
This will open a dialog box to allow for ALL color adjustments.
STEP 3
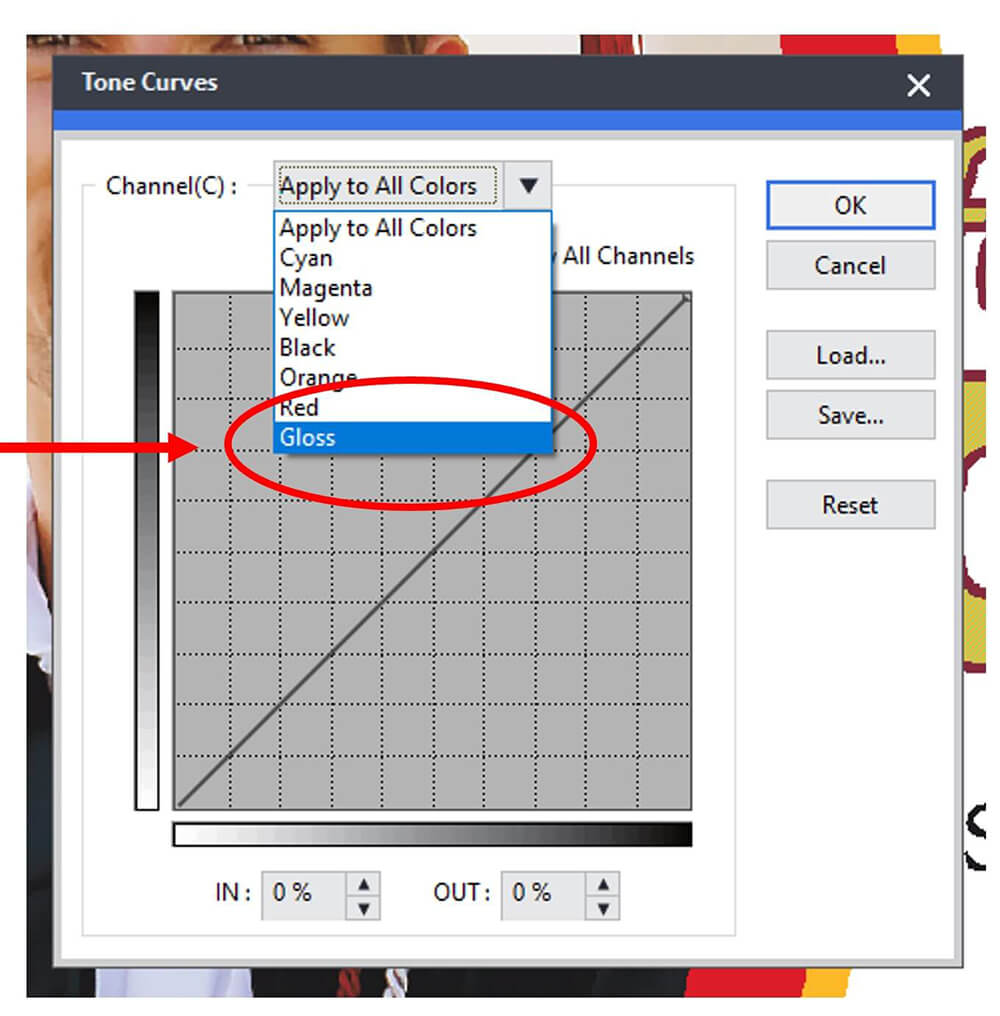
Select the Gloss ink Channel.
STEP 4
Grab the small circle at the top RIGHT corner circle of the Spline Curve and move it DOWN along the right edge of the Channel Box.
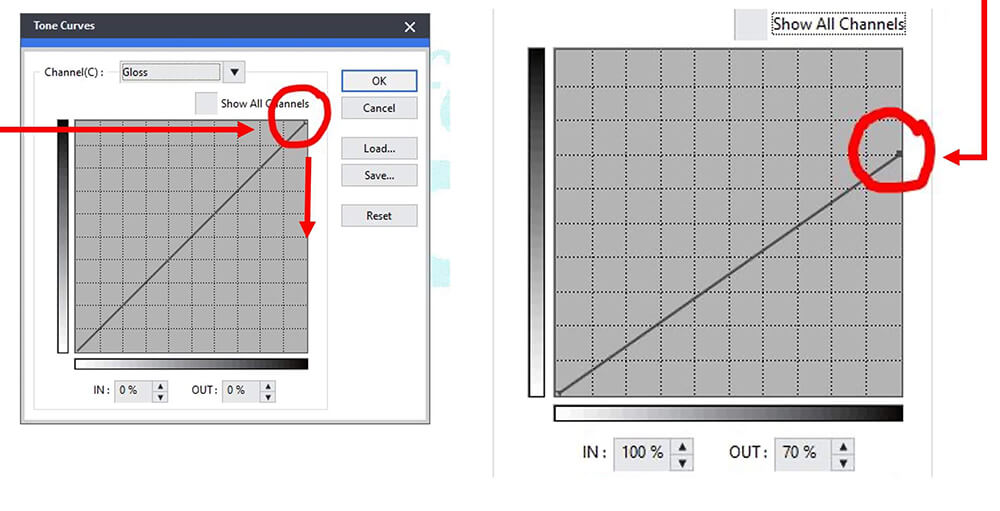
STEP 5 - Test Your Results
The above adjustment reduced the Gloss Volume by 30% (from 100% to 70%). You can make any movements along this Spline Curve that you desire. It is best, however, that you practice and TEST which changes create the desired effect. There is no “right” or “wrong” way to reduce the ink density - this will just assist you with your desired results.
